Discussion guides
A discussion guide is the list of questions and topics that structures an interview. In LetsFindWhy you build a guide once, attach it to any interview, and it appears in the meeting room as a live checklist you tick off as the conversation moves along.
Guides keep interviews consistent. Every session covers the same ground in the same order, so you can compare what different people said instead of relying on memory and improvisation.
Suppose you run a SaaS product and want to know why people cancel their subscription. Write your questions into a guide once (“What made you sign up?”, “What changed for you this year?”) and every interview covers all of them, whoever runs it.
You don’t need to know how to open or close an interview either: every new guide arrives with a ready-made introduction and closing script already written, and you can hand the whole guide to the AI moderator (a built-in interviewer that runs sessions for you) to conduct from start to finish.
How discussion guides work: parts, libraries, and reusing a guide
Four ideas cover everything on this page:
- A guide has three parts: an Introduction read aloud before the first question, an ordered list of questions, and a Closing read aloud after the last question. The introduction and closing come pre-filled with sensible default scripts and can never be left blank. Clearing one restores the default.
- Questions come in five types: “Open ended” (a plain question), “With follow-ups (2x minutes)” (the AI moderator probes the answer with extra questions), “Image” (a picture you show to participants), “Whiteboard” (a shared drawing canvas), and “Rating or choice” (a question people answer on screen, such as a 1 to 5 rating, a pick from a list, or a number).
- Guides live in your organization’s shared library, so every project can use them. Guides created for a single project, for example by AI project setup, appear in a separate “This project” section, visible only while that project is selected.
- Assigning a guide to an interview copies it. The interview keeps its own copy of the questions, so editing the template later never changes sessions already underway, unless you pull the changes in with Sync with template.
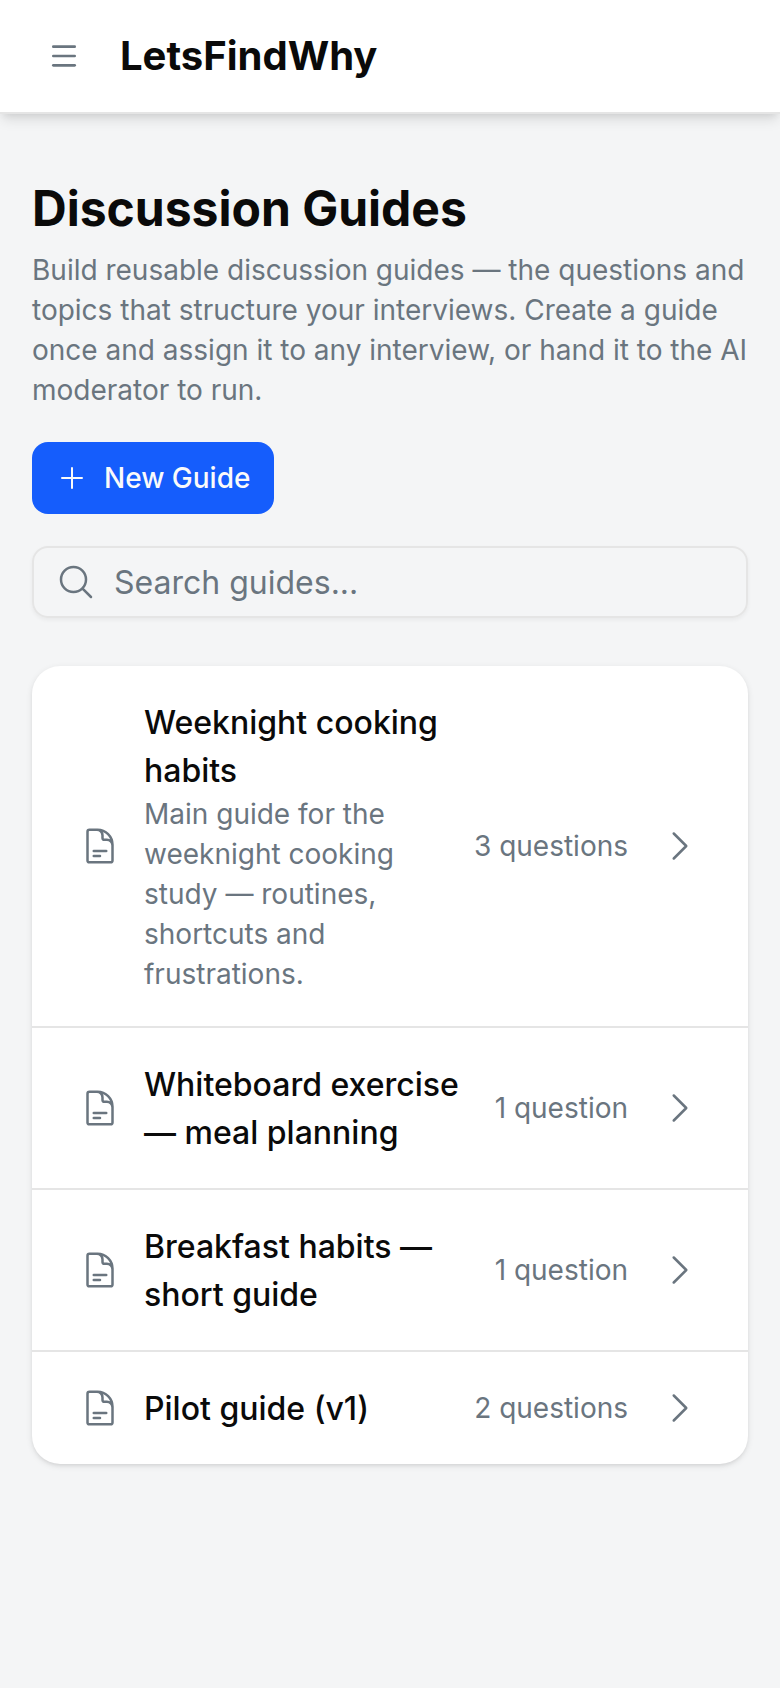
How to create a discussion guide
Only organization Owners and Admins can create and edit guides; other members can view them and assign them to interviews.
- Click Discussion Guides in the Organization section of the sidebar.
- Click New Guide. The Create Discussion Guide dialog opens.
- Enter a Title (for example “User Onboarding Interview”) and an optional Description, then click Create Guide.
- Reword the pre-filled Introduction and Closing scripts in your own voice. Click a box to edit it, then save. Saving one empty just restores the default text.
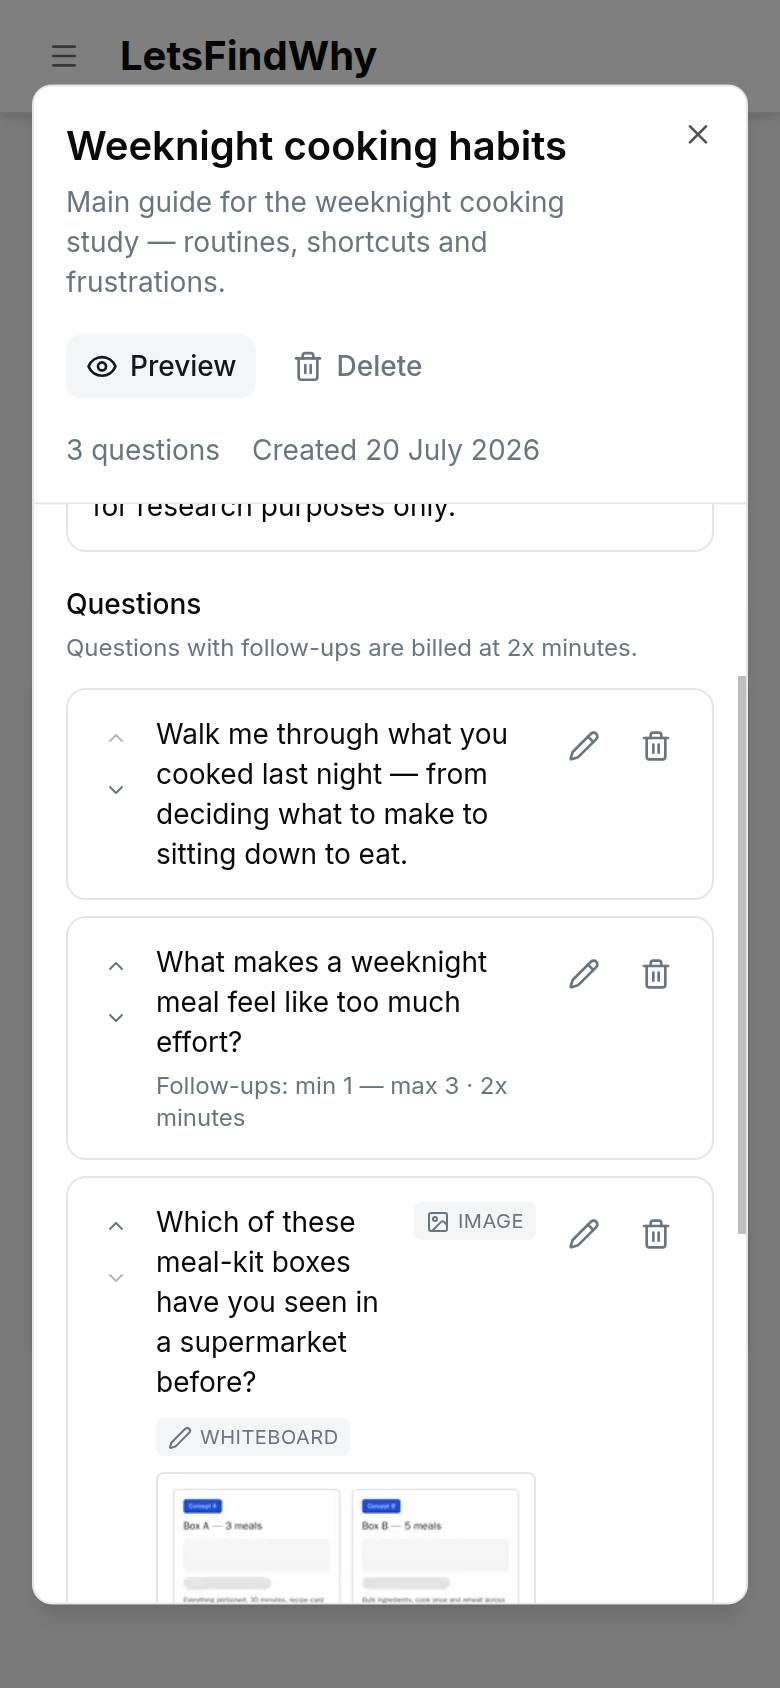
How to add questions, images, and whiteboards to a guide
Each entry in your guide is a question to ask, an image to react to, or a whiteboard to draw on.
- Click Add Question and type the question text.
- Pick a Question type: Open ended, With follow-ups (2x minutes), Image, Whiteboard, or Rating or choice.
- For With follow-ups, set the Minimum follow-ups and Maximum follow-ups steppers (0 to 5 each) to control how hard the AI moderator probes.
- For Image, click Upload image (PNG, JPEG, WebP, or GIF, up to 10 MB), add an Optional caption, and tick Show on whiteboard if participants should be able to draw on the picture.
- For Rating or choice, choose How they answer (a rating scale, a recommend score, pick one, pick several, put in order, or a number) and fill in its options or scale; the Respondent sees preview shows the result. Under After the answer, Just the answer saves it and moves on, and Answer, then ask why has the AI moderator ask what made them choose it (2x minutes).
- A rating or choice question can also carry an image to rate, such as a screen design or a pricing page: click Upload image and it appears above the answer. Tick Let me share the results with the room if you may want to show everyone the percentages afterwards.
- Save the entry and repeat until the guide is complete.
- Reorder questions by dragging them or with the Move up and Move down chevrons; the pencil edits an entry, the trash icon deletes it.
- Click Preview to see the guide as the checklist you’ll work from in the meeting room; Edit switches back.
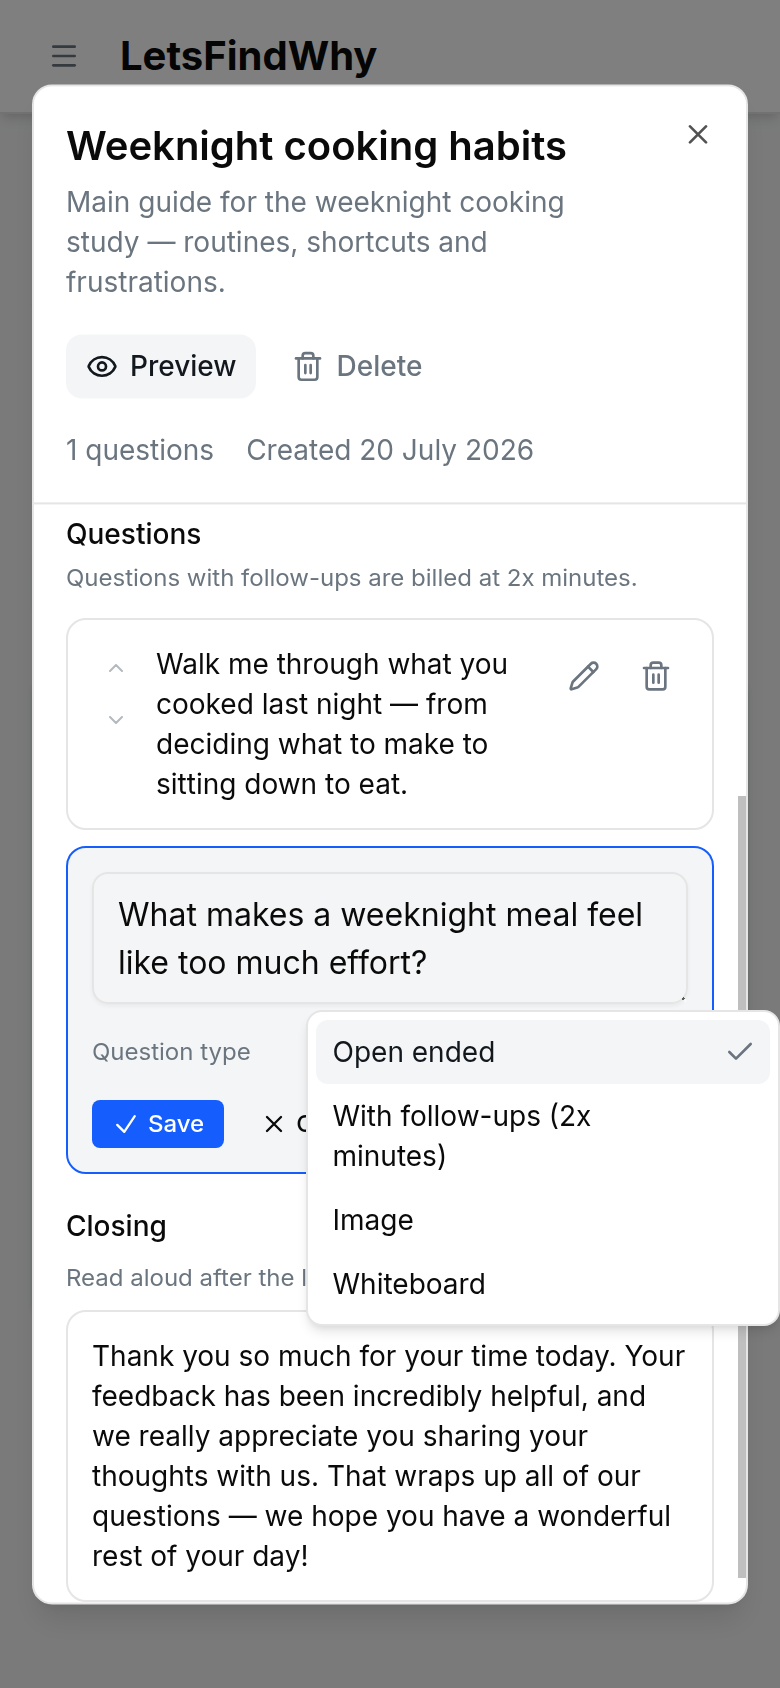
Once anyone has answered a rating or choice question in any interview, how it is answered is locked, in the guide and in every interview’s copy of it, including copies that have no answers yet: its format and scale can no longer change, because the Responses page would mix answers to different questions. You can still reword it, rename options and add new ones; a deleted option is kept for the answers already given. To ask it a different way, add a new question. An interview’s copy that was changed before anyone answered keeps its own format: the Responses page charts it as a separate entry, labelled with the sessions that asked it that way.
Questions of the With follow-ups type are metered at twice the normal rate. The editor reminds you that “Questions with follow-ups are billed at 2x minutes.” See Billing & usage for how minutes are counted.
How to assign a discussion guide to an interview
You can attach one guide per interview, either while creating the interview or any time after.
- When creating an interview, pick a guide from the Discussion Guide (optional) dropdown. It lists all available guides from the organization library and the selected project.
- To attach one to an existing interview, open it and click Assign Discussion Guide.
- In the Select a Discussion Guide panel, click a guide card, then click Assign Guide.
- Check the result: the interview now shows the guide’s title, its question count, and a progress bar.
- You can also assign one to a finished recording. Open it from the project’s Recordings page, click the Recording options menu at the top right, and choose Assign discussion guide. The same panel opens in a dialog. Assigning here immediately matches the guide’s questions against the transcript, so the question markers appear beside the lines where each was asked.
Assigning copies the guide as it is right now. Later template edits reach the interview only when you click Sync with template; Remove guide unassigns it.
Deleting a template never breaks interviews that use it: each keeps its own copy and shows “Source template has been deleted” where the sync button was.
How to create a guide from a recording’s transcript
If an interview was run without a guide (an unstructured first conversation, or a recording you uploaded from elsewhere), you can turn it into one. The AI reads what the moderator asked and writes it up as a reusable guide, so the same questions can be put to everyone you talk to next.
- Open the recording and choose Create guide from transcript from the Recording options menu. It is unavailable while the transcript is still being processed (generating from half a transcript would miss the back half of the session), and when AI features are not enabled on your deployment; the menu says which.
- If a guide is already attached to this recording, you are asked to confirm first: creating a new one replaces it, and the question markers you placed or dismissed for the old guide are lost.
- Watch the questions appear one at a time. Nothing is saved yet: closing the dialog or hitting Discard at this point leaves nothing behind.
- Click Create guide to save it to the project. The dialog then becomes the normal guide editor on it, so you can reword, add, delete and reorder questions without leaving the page.
- Click Done. The guide is attached to the recording, and its question markers appear on the transcript it came from.
It reads this session’s transcript only, and only the moderator’s turns. The guide is a list of what was asked, so the answers are left out. A very long session is read from the start until the budget runs out.
Questions come back tidied up rather than word-for-word: spoken false starts and self-corrections become the question a researcher would have written down. Each one gets a type and follow-up range. An introduction and a closing are written for you, and the guide is titled after the session so two generated guides in one project are tellable apart. No screener is generated: nothing in a transcript says who should have been screened in, and a wrong screener is worse than none.
The guide is written in the language the interview was conducted in, not the language of your interface, because it is meant to be re-run with the next respondents in that market.
How to use a discussion guide during a live interview
The moderator drives the checklist. Observers (teammates who watch without being seen) see the same list live but can’t check anything off. Panelists (participants on camera) never see the guide. They only see images, whiteboards and rating or choice questions when those are shown on screen.
- Open the guide panel in the meeting room. It shows the guide title, a progress bar such as “3/10 (30%)”, the Introduction, every question, and the Closing.
- Click the Introduction row once you’ve read it aloud. It turns green and progress advances. Click again to un-mark it.
- Click each question row as you cover it. Unchecking a question also clears any follow-ups recorded for it.
- Click Show image or Show whiteboard on an image or whiteboard entry to put it on everyone’s screen. The question checks itself off. Hide takes it down again without unchecking anything.
- Click Show question on a rating or choice question and every respondent gets it on their own screen to answer. While it is shown they can change their answer; Stop answers takes it down and closes it. Showing it again reopens it.
- Under the question, the panel counts the answers (“2 of 2 answered”), draws them as a chart, and lists each respondent’s answer with how it was given: tapped, said aloud to the AI moderator, or entered by a moderator. If someone says their answer instead of tapping it, click Enter answer next to their name; Change corrects one, at any time.
- Respondents never see each other’s answers while answering. If the question allows it, Share results with the room appears once you stop answers and shows everyone the percentages, never who gave what.
- Click Edit in the panel header to add, reword, reorder, or delete questions mid-session. Changes touch only this interview’s copy, and everyone’s panel updates live.
- Click Change to swap guides: Switch Guide takes a fresh copy and discards all progress, or Remove to drop the guide entirely.
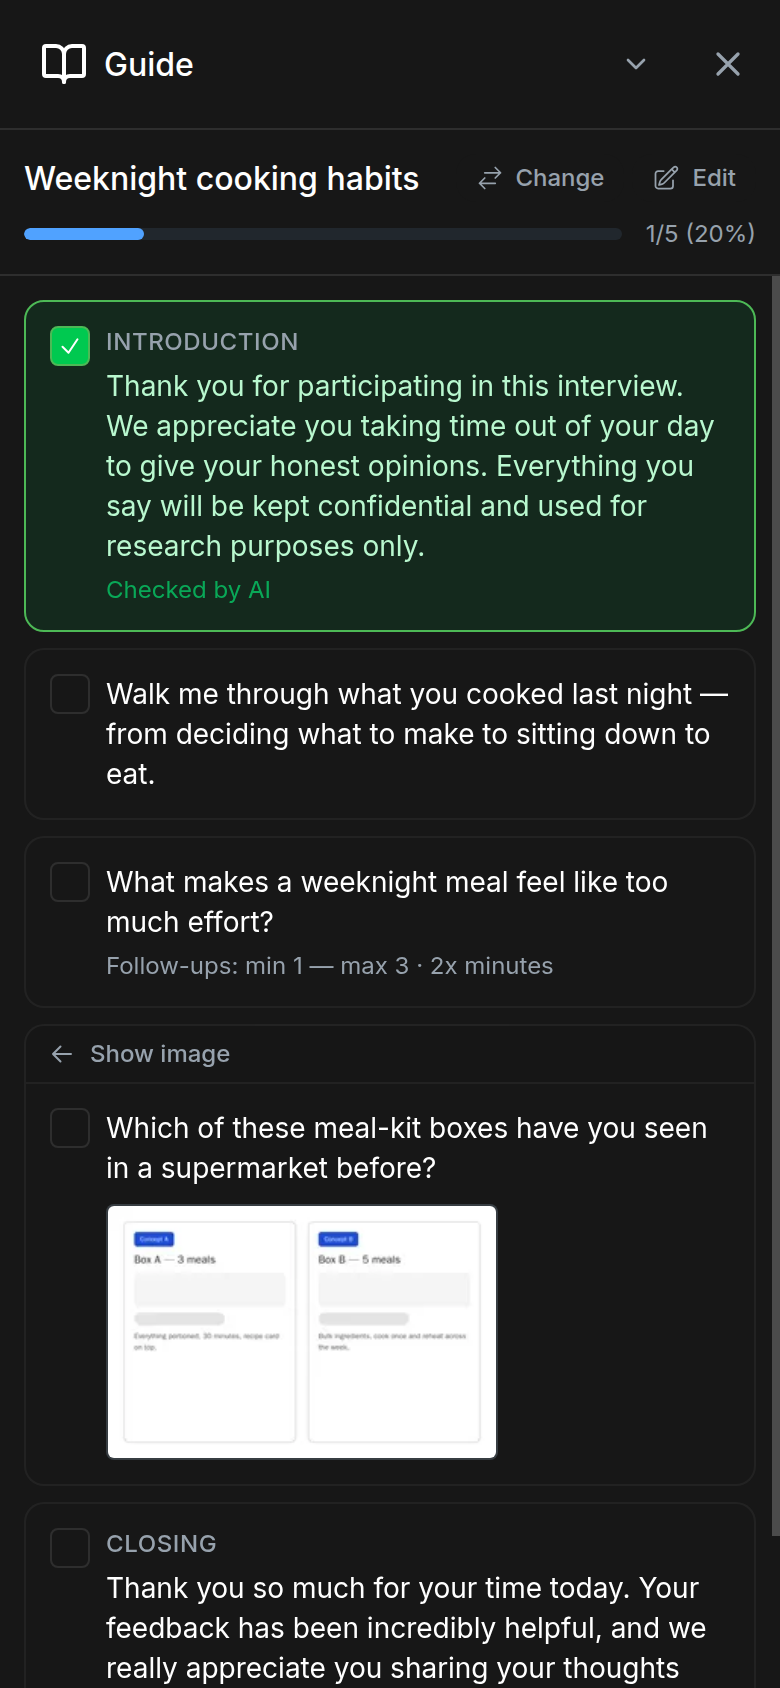
Need a quick poll mid-session? Click Edit, add a Rating or choice question, and show it. It isn’t added to the template, but Responses still charts it as its own entry, pooling the answers from every session where a question with the same wording was added.
How the AI moderator runs your discussion guide
The same guide can be run end to end by the AI moderator: it reads your introduction, asks every question, probes with follow-ups, and closes the session. Setup details live in AI-moderated interviews.
- Click Invite AI Moderator in the guide panel. Moderators and observers can both do this.
- Watch the Introduction row pulse with “AI is reading...” while the AI reads your script aloud, then check itself off.
- The AI asks each unchecked question in order. The row shows “AI is asking...”, then “Waiting for response...” while the participant answers.
- On With follow-ups questions the AI probes the answer (at least your minimum, at most your maximum) and each follow-up it asks appears in italics under the question.
- Completed questions are marked “Checked by AI”, and image and whiteboard entries appear on participants’ screens as the AI reaches them.
- After the last question the AI reads the Closing. Progress reaches 100% and the interview is complete.
Processes that start AI interviews the moment a respondent arrives need a Default discussion guide picked in their settings. Without one, the process asks you to create a guide first.
Tips for researchers
- Template edits are fieldwork-safe: sessions keep their snapshot until you Sync with template, and sync deliberately preserves checked progress, locally added questions, and live whiteboard drawings, and it never deletes questions from the session copy.
- Tune probing per question: the minimum forces the AI to dig even after a fluent answer, the maximum caps time spent, and between the two it advances once it judges the response sufficient.
- Image and Whiteboard entries cover classic stimulus techniques (concept tests, ad recall, projective drawing) inside the room. Show on whiteboard turns an image into a drawable background; moderators and panelists can draw, observers view only.
- Mid-session, prefer Sync with template over Change: Switch Guide takes a fresh snapshot and throws away all checked progress.
- Unchecking a question resets its recorded follow-ups. Handy when you want the AI to revisit a topic properly instead of skipping it.
- Limits worth knowing: titles up to 200 characters, descriptions 1,000, the introduction, closing, and each question 2,000, images 10 MB, and 0–5 follow-ups per question.