Uploads & media
Your research doesn’t all happen inside LetsFindWhy. If you already have interviews on file (Zoom calls, phone recordings, footage handed over by an agency), you can upload them to a project, and each file becomes a regular recording: playable, downloadable, and automatically transcribed.
You can also upload pictures for your interviews. A discussion guide (the list of questions and topics that structures an interview) can include an image question (a product photo, an ad mock-up, a new logo) shown to participants during the session so you can capture their reactions.
Say you recorded three user calls on your phone last month. Drag the files onto your project’s Recordings page and come back to searchable transcripts. No transcription service, no file conversion. Then add a screenshot of your new UI to a guide and ask the next users what they’d change.
What you can upload: interview recordings and guide images
Two kinds of upload cover the two jobs:
- Media uploads: video or audio files added on a project’s Recordings page. Each file becomes its own recording, titled with the file name and marked with an Uploaded badge. The server converts it to a playable format (audio-only files get a waveform video) and writes a transcript with the voices separated.
- Guide images: pictures attached to an Image question in a discussion guide. The server optimizes each picture, and participants see it at that point in the interview, optionally as a background they can draw on in the whiteboard.
Media uploads spend the same billed-minute allowance as live sessions, at the file’s actual length. Your remaining minutes are checked before and during every upload. A file that doesn’t fit is rejected rather than billed, so an upload can never cause a surprise overage.
If a backlog of existing recordings won’t fit in the minutes you have left, compare the monthly minutes included with each plan. The same allowance covers both uploads and live sessions.
How to upload existing recordings to a project
Anyone who can create interviews in a project can also upload media to it.
- Open Recordings in the project sidebar.
- Click Upload media and pick one or more files, or drag them anywhere onto the page; a dashed Drop video or audio files to upload banner appears. Common video and audio formats are accepted (MP4, MOV, WebM, MKV, MP3, WAV, M4A, FLAC, and more), up to 20 GiB per file.
- Watch the floating Uploads panel that opens bottom-right. Each file first shows Checking… while its length is measured against your plan’s remaining minutes; a file that doesn’t fit shows Rejected and never uploads.
- Let the rest upload. Each row has a progress bar with Pause, Resume, and Cancel controls, and Retry if a file fails. You can navigate anywhere in the app; the panel and its uploads come along.
- Wait for a row to reach Processing. A notice above the panel confirms the file uploaded and processing has started. From here the work happens on the server, so you can close the tab.
Each upload then appears on the Recordings page as its own card, titled with the file name and marked with an Uploaded badge. While the server converts and transcribes it, the card shows a Processing chip; the page refreshes itself every few seconds, so the card flips to Play on its own.
Open the finished recording to watch it, Download it, or read its Transcript. Deleting a recording permanently removes it and its transcript. This can’t be undone.
How to resume an interrupted upload
Big files over shaky Wi-Fi fail sometimes. Uploads are built to pick up where they left off, in the same browser you started from.
- Stay on the page while files are moving if you can. The browser warns before you leave while any file is Uploading or Paused. Files that reached Processing are safe; the server finishes them without you.
- Reopen the app if the tab reloaded anyway: the Uploads panel restores in-flight uploads and resumes them automatically where it can.
- Re-select the same file if it can’t resume on its own. Click Upload media and pick it again within 24 hours. The upload continues from the parts that already arrived instead of starting over.
- Start fresh after 24 hours: an upload left untouched for a day is abandoned and its partial data is cleared, so picking the file again begins a new upload.
How to add an image to a discussion guide
Pictures live inside a guide’s questions. You need to be an organization Owner or Admin to upload guide images.
- Open Discussion Guides in the sidebar and open a guide in the editor, or create one with New Guide.
- Add or edit a question and set Question type to Image.
- Fill in the Optional caption if the picture needs framing text. For an image question, the picture itself is the content.
- Click Upload image and pick a PNG, JPEG, WebP, or GIF up to 10 MB. A progress bar tracks the upload, then the button reads Optimizing… while the server resizes and compresses the picture.
- Check the preview: a thumbnail appears above the button, the button now reads Replace image, and the question carries an Image chip in the guide’s question list.
- Tick Show on whiteboard if you want the picture as a locked background of the session whiteboard, so participants can draw over it.
- Click Save.
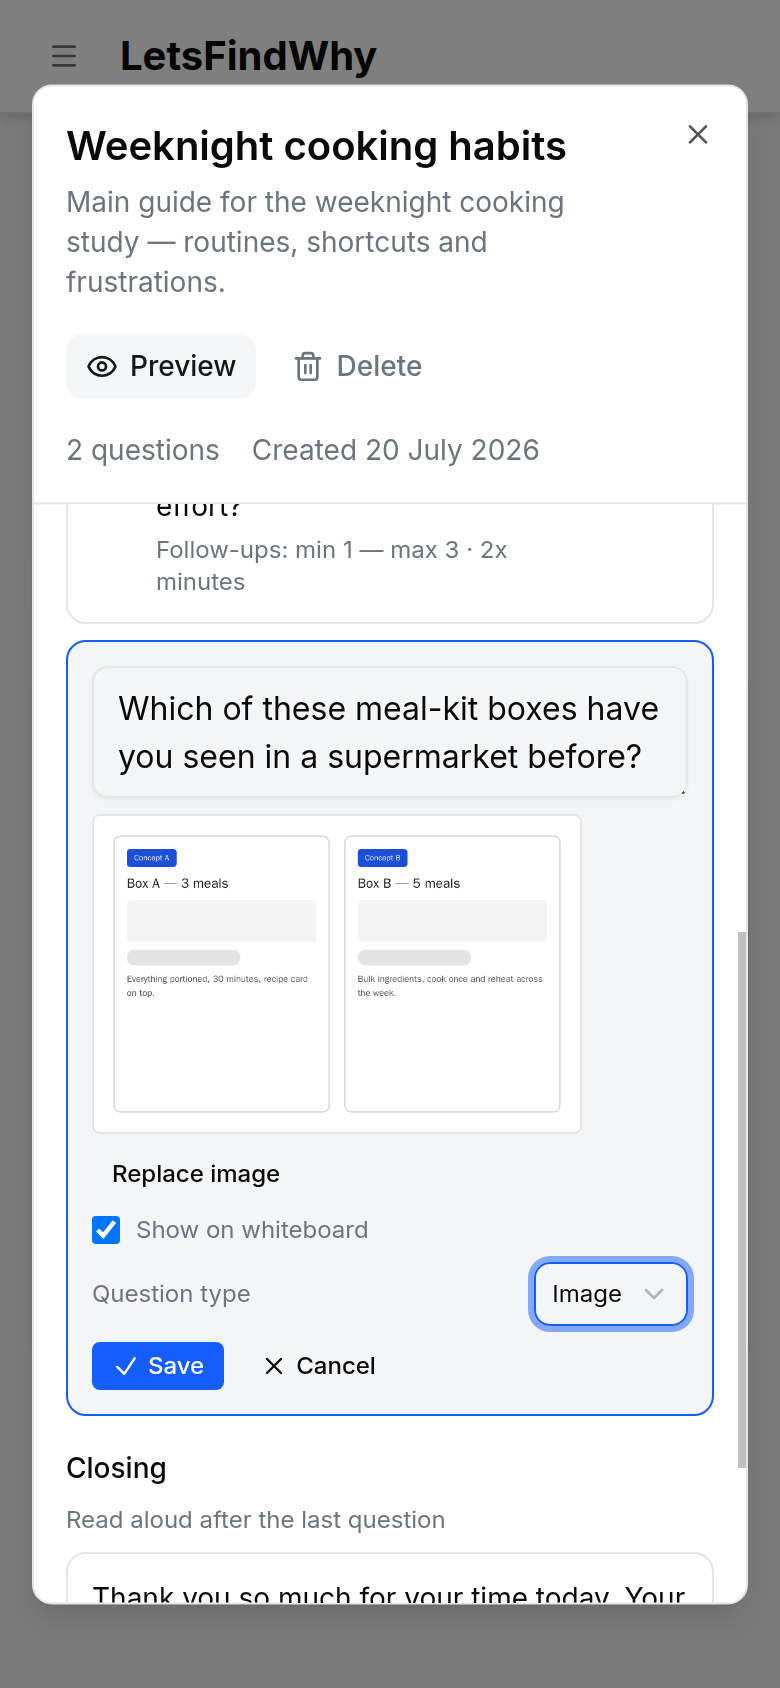
During a live session, moderators can also attach or replace a question’s image from the in-meeting Guide panel using the same form. On the whiteboard, moderators and panelists can draw over the image; observers only watch.
Tips for researchers
- Name files before uploading: each file becomes its own recording titled with the file name, and there’s no renaming at upload or attaching a file to an existing interview. A convention like “P07-madrid-2026-05.mp4” keeps the Recordings page scannable.
- Upload a back catalogue in one go. Select every file at once, then carry on working elsewhere in the app. The Uploads panel keeps running, and an interrupted file resumes rather than restarting.
- Uploaded files are transcribed with speaker diarization (voices split into “Speaker 1”, “Speaker 2”, and so on). Rename them to real names on the playback page before the team starts quoting.
- A file rejected during server-side processing leaves no card behind: its row in the Uploads panel never moves past Processing, and its card (which shows briefly with a Processing chip) simply disappears from the Recordings page. If that happens, the file was rejected (unreadable media, or longer than your remaining minutes) and was not billed. The Failed row and its notice appear only when the upload itself fails (a network or transfer error), where Retry is offered.
- Some formats (commonly .mkv and .flac) can’t be measured in the browser, so they skip the up-front minute check and are verified on the server instead. The worst case is a rejected file, never an overage charge.
- Use Show on whiteboard for markup exercises. “Circle what you’d change on this pack” works well. Moderators and panelists can draw; observers only view.
- A card stuck on Processing recovers on its own: processing is restarted automatically within about an hour, so there’s no need to re-upload.