Projects & organizations
Everything you do in LetsFindWhy happens inside an organization, a shared workspace that holds your team, your projects, and your billing. Inside it, each project keeps one research study together: its recruitment, screeners, interviews, recordings, and reports all live in one place.
There’s no setup to get through first. The first time you sign in, LetsFindWhy creates an organization for you automatically (named after you, like “Maya’s Organization”) with you as its Owner. Many teams only ever need this one.
Imagine you want to know why users abandon a new feature in your software. Create one project for that question and keep all its interviews and findings inside it. When you later test a new pricing plan, that becomes a second project: same organization, same team, nothing mixed together.
How organizations, projects, and roles fit together
An organization contains projects, members, and shared libraries. Every member can see every project in the organization (there are no private projects) and the Discussion Guides and Screener Library in the organization sidebar are shared across all of them.
Each member of an organization has one of three roles:
- Owner: full control of the organization, including billing, granting the Owner role, and deleting the organization. Whoever creates an organization is its Owner.
- Admin: can rename the organization, invite and remove members, change roles (except for Owners), and create or delete projects.
- Member: can work in every project and create and run interviews, but can’t create or delete projects, invite people, or change organization settings.
Each organization also has its own web address and its own subscription. A plan badge such as “Starter” or “No Subscription” appears next to the organization name wherever it shows up.
How to create a project
You need to be an Owner or Admin of the organization to create projects.
- On the Start page, click New Project on the organization’s card, or open the organization’s Projects page from the sidebar and click New Project there.
- In the Create Project dialog, choose Blank project, or describe your research and let LetsFindWhy draft the whole setup for you, including a screener and an interview guide.
- Enter a Project Name (up to 100 characters) and, if it helps your team, a short Description (optional) (up to 500 characters).
- Click Create Project.
- You land in the new project. The sidebar now shows its pages: Dashboard, Processes, Recruitment, Screeners, Interviews, Recordings, Reports, and Project Settings.
How to create a new organization
Create another organization when you want a second workspace with its own team and its own billing, for example one per client.
- Go to the Start page. It lists every organization and project you can access.
- Click New Organization.
- In the Create Organization dialog, enter an Organization Name (up to 100 characters). You’ll be the Owner of the new organization.
- Click Create Organization.
- The new organization appears on the Start page with a “No Subscription” badge and an empty project list. Click Create your first project to get going.
How to invite a teammate to your organization
Anyone you invite joins the whole organization and sees all of its projects. Owners and Admins can send invitations; for Members the Invite Member button is disabled.
- Open Organization Settings from the sidebar.
- In the Members card, click Invite Member.
- Enter your teammate’s Email.
- Pick a Role: Admin or Member (only an Owner can also offer the Owner role). Member is the default and a safe choice: Members can run research but can’t delete projects, invite others, or change organization settings.
- Click Send Invitation. The invitation appears in the Pending Invitations card, where you can withdraw it with Cancel Invitation.
Your teammate gets a “You’re invited” email with an Accept Invitation button. The link expires after 48 hours. If it lapses, cancel the pending invitation and send a new one.
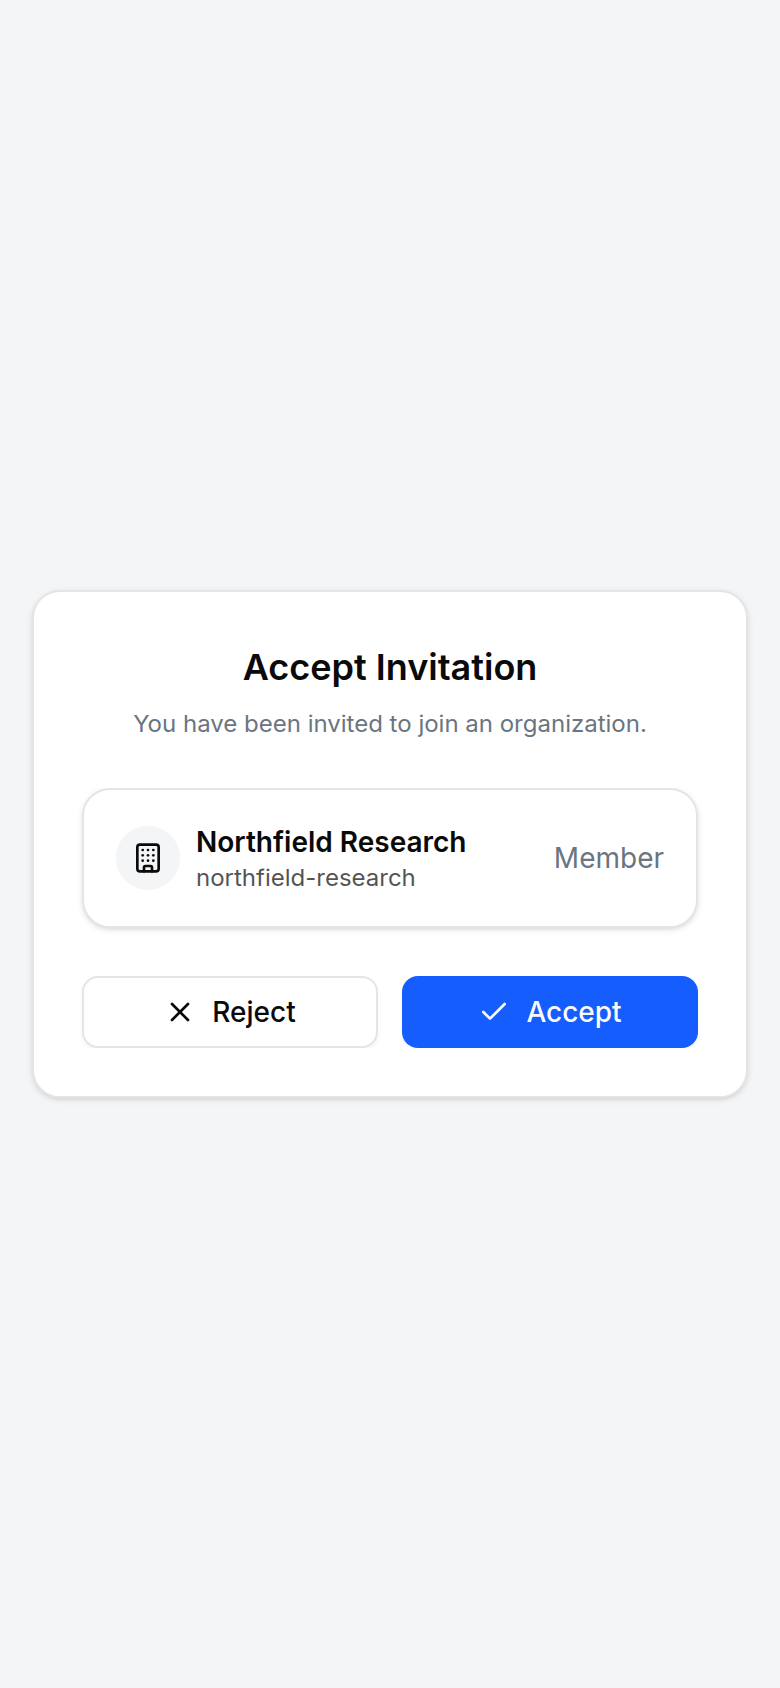
If they don’t have a LetsFindWhy account yet, the link takes them through sign-up first. They then choose Accept or Reject. After accepting, they join with the role you picked and the organization appears on their Start page.
How to change a member’s role or remove a member
- Open Organization Settings and find the person in the Members card.
- Open their actions menu and choose Update Role, pick the new role, and confirm.
- To take someone off the team, choose Remove Member and confirm.
Admins can’t change or remove Owners, and only an Owner can grant the Owner role. You can leave an organization yourself with Leave Organization, unless you’re its Owner, in which case transfer ownership to someone else first.
How to rename an organization or change its URL
- Open Organization Settings from the sidebar.
- In the Name card, enter the new name and save. This changes only the visible name.
- In the Slug URL card, edit the slug (the short identifier in your workspace’s web addresses) and save.
Changing the slug changes every link into your workspace, so links your team saved earlier stop working. Project addresses work the other way round: they’re generated from the project’s name at creation and never change, even if you rename the project.
How to switch between organizations and projects
- The organization switcher at the top of the sidebar's Organization section shows your current organization; use it to jump straight to another one.
- Or return to the Start page and use Search organizations and projects... to filter everything you can access.
- Click any project row to open its Dashboard.
How to delete a project or an organization
Deleting a project removes all of its sessions and data, so download any recordings or reports you still need first.
- Open Project Settings at the bottom of the project sidebar.
- In the Danger Zone, click Delete project.
- Type the project’s name to confirm, then click Permanently delete.
Deleting a whole organization is Owner-only: use Delete Organization at the bottom of the Organization Settings page and type the organization’s slug to confirm. While a subscription is active, the page asks you to cancel it first. See Billing & usage.
Tips for researchers
- Run one organization per client. Every member sees every project in an organization, so organization boundaries are your confidentiality boundaries. One client’s stakeholders should never share an organization with another client’s studies.
- Invite client-side stakeholders and junior colleagues as Member. They can observe sessions and work inside projects, but can’t restructure the workspace, manage the roster, or change organization settings.
- Keep master instruments in the organization libraries (Discussion Guides and Screener Library in the organization sidebar) so each new study starts from proven material instead of a copy-paste. See Discussion guides and Recruitment & screeners.
- For multi-market studies, keep one project per study and run a Process per language or audience inside it, rather than splitting the study across projects.
- A deleted project isn’t purged immediately (there’s a 30-day window in which it can be restored), but restoring isn’t self-serve, so treat Permanently delete as final and export transcripts first.
- Invitations expire 48 hours after sending. Check the Pending Invitations card before a fieldwork week and re-invite anyone whose link lapsed.