Meetings & live sessions
A meeting in LetsFindWhy, called an interview throughout the app, is a live video call built for customer research. You talk with one person or a small group, teammates can watch silently, and the whole conversation can be recorded and transcribed.
There’s nothing to install. You create an interview inside a project, send someone a link, and they join from their web browser, with no account or download needed on their side.
Imagine a new board view in your project-management tool is confusing people. Create an interview, email the join link to a user, and spend twenty minutes watching them work through it. Your designer can watch live as an observer without ever appearing on screen.
How meetings work: roles, statuses, and the waiting room
Every interview has three roles:
- Moderator: you or a teammate running the session. Moderators sign in with their LetsFindWhy account.
- Panelist: the person you’re interviewing (your respondent). Panelists can join as guests with nothing but a link.
- Observer: a silent viewer, such as a colleague or client. Observers never share a camera or microphone, and panelists can’t see them in the participant list.
An interview moves through three statuses (SCHEDULED before it starts, ACTIVE while it runs, and ENDED afterwards), shown as a badge on the Interviews page.
Panelists and observers don’t drop straight into the call. They set up their camera and microphone first, then sit in a waiting room until the moderator admits them, so you always control who is in the room.
The research topic stays blind: panelists never see the interview title, so you can name interviews after the topic or audience segment without revealing it to respondents.
Plans differ in how much interview they include. The plan comparison on the pricing page lists the maximum session length, the number of people on camera, and the number of observers each plan offers, alongside its monthly minutes and recording.
How to create an interview
- Open your project and click Interviews in the sidebar.
- Click New Interview. The Create New Interview dialog opens.
- Enter an Interview Title and, if useful, a description. Respondents never see the title, so name it whatever helps you.
- Pick a Process (the study track the interview belongs to) and, if the process runs in several languages, a Language.
- Set Expected Respondents (1–100). For a 1:1 interview scheduling is optional; for a focus group of two or more, a Date & Time is required.
- Optionally pick a Date & Time, and turn on Use AI Moderator if you want the AI to start on its own. Recording needs no setting: every interview records automatically.
- Click Create. The interview appears in the list with a SCHEDULED badge either way; Ad-Hoc is shown in the interview’s Date & Time field when no time is set.
How to share join links and invite participants
There are two ways to get people into an interview: quick role links you copy and send yourself, and personal email invitations for recruited respondents.
Share role links
- On the interview row, open Share Links.
- Copy the link for the role you need. The moderator link requires signing in; panelist and observer links work for guests.
- Send the panelist link to your respondent and the observer link to anyone who should watch silently.
Invite recruited respondents by email
- Click Invite participants on the interview. Each selected respondent receives a personal join link by email.
- Select respondents (anyone on the Recruitment list can be invited except those who failed your screener) and click Send invitation(s). Scheduled interviews include the start time in each respondent’s own timezone plus a calendar attachment.
- Manage each invitation from the participants list: Re-send invitation email or Revoke invitation. A revoked link stops working, and you can re-invite the same person later with a fresh link.
Invitations are capped at the interview’s Expected Respondents, and an interview on a scheduled process needs its Date & Time set before you can invite anyone. When a respondent first joins, you get an email with a one-click moderator link.
How to join a meeting as a panelist or observer
Share these steps with participants: joining takes under a minute and works in any modern browser.
- Open the link you were sent.
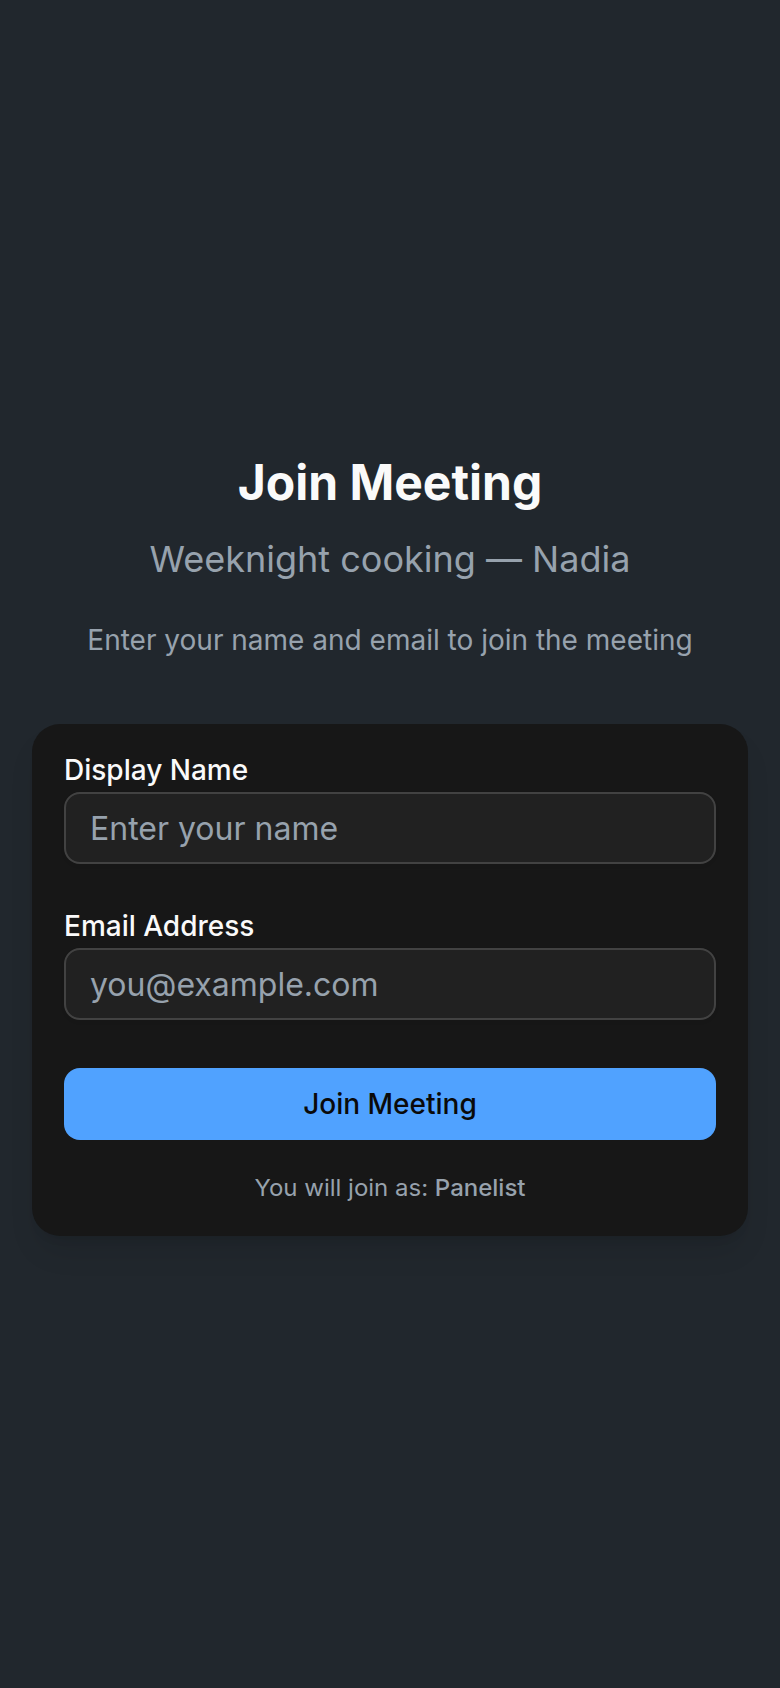
- On the Join Meeting page, enter your Display Name and Email Address, then click Join Meeting. Personal email invitations skip this form.
- Click Set Up Devices and allow camera and microphone access when the browser asks. Check your preview and toggle your mic or camera. Observers only choose a speaker. Their camera and microphone are never shared.
- Click Ready to Join. You’ll see “Waiting for the moderator to let you in”. Panelists can read and send public chat while they wait; observers can read it.
- When the moderator admits you, you enter the call and your camera and microphone start automatically.
How to run a meeting as the moderator
- Click Join on the interview row. Moderators enter directly. There’s no waiting room for you.
- Check your camera and microphone on the preview screen, then click Join Meeting. Joining a scheduled interview at its start time switches it to ACTIVE.
- Open the sidebar’s participants tab to let people in: the Waiting Room section lists everyone waiting, with Admit per person and Admit All.
- Run the call from the bottom control bar: mic and camera toggles, plus a menu with raise hand, screen share, Start recording / Stop recording, mute all, and leaving. A red ring around the menu button shows while recording.
- Manage participants from the sidebar: mute someone, request their video on, rename them, or Remove participant. Panelist screen-share requests wait for your approval before anything is shown.
- To finish, click Leave meeting and choose End meeting for everyone or Just leave. Ending stops the recording and the AI moderator and closes the room for everyone.
After the meeting ends, participants see a simple “This meeting has ended” page, while you can open the recording or head back to your project.
How to use in-meeting chat: Public Chat, Backroom, and Private Messages
Open the sidebar’s chat tab and you’ll see up to three channels, depending on your role:
- Public Chat: everyone can read it, and moderators and panelists can write. Observers read only. It’s also available while waiting to be admitted.
- Backroom: a private channel for moderators and observers only. Panelists can’t read it or even see that it exists, so your team and clients can discuss the session freely.
- Private Messages: one-to-one threads started with New conversation. Only moderators and panelists see the Private tab; observers don’t have private messaging. They reach moderators via the Backroom channel. For guests who aren’t signed in, only public chat is saved: they can still exchange live private messages with a moderator during the call, but those aren’t stored and guests can’t browse history or start conversations.
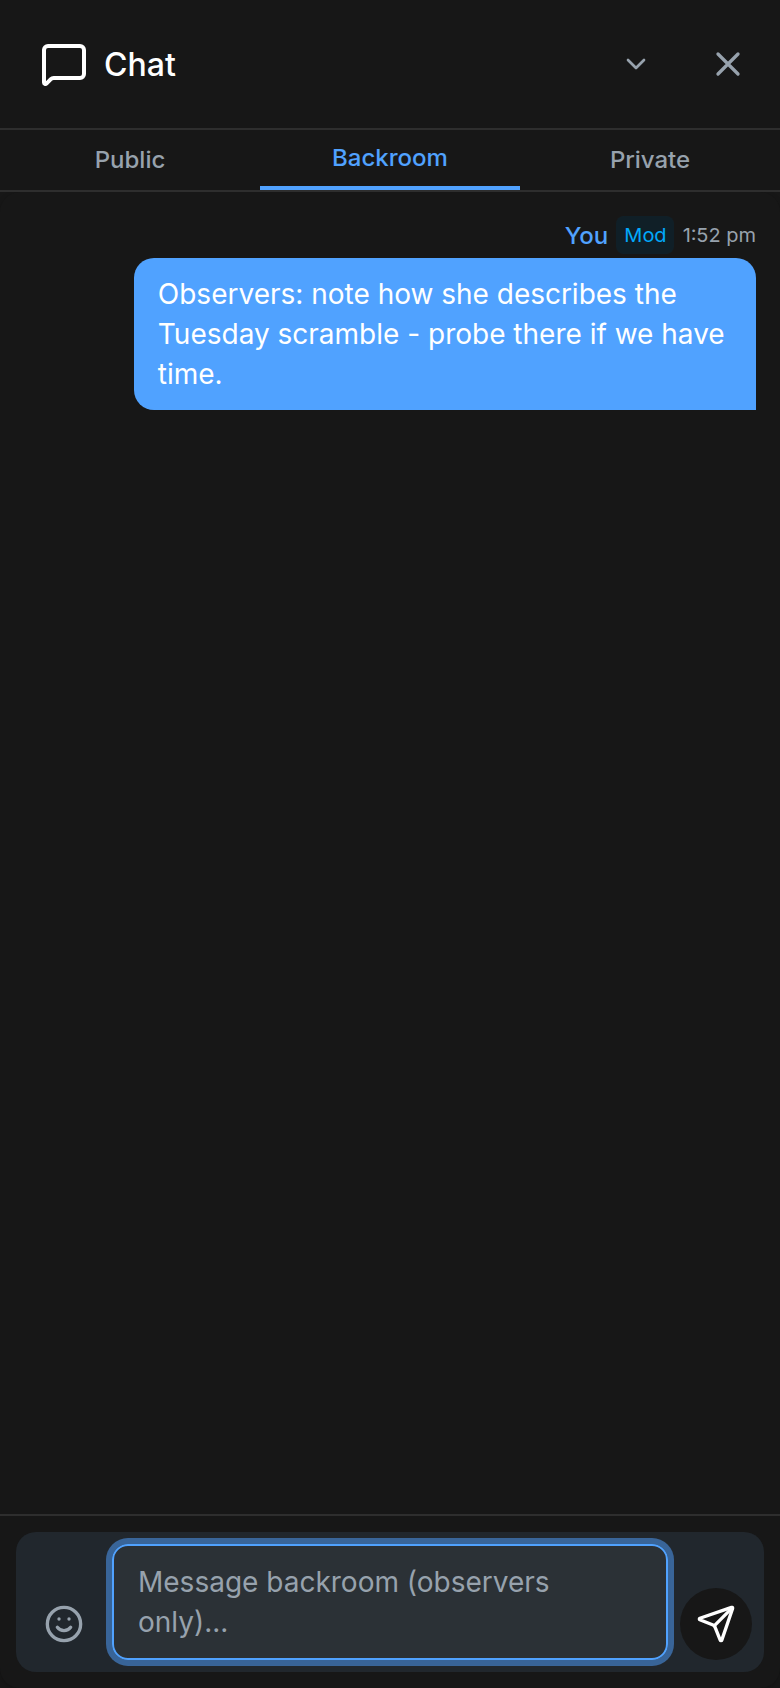
Chat history is saved with the session, so messages survive a page refresh.
How to run instant one-on-one AI interviews
If you’d rather not schedule calls at all, a process can give every respondent their own AI-run interview that starts the moment they click their link:
- On your process, turn on Immediate AI interviews and set a Default discussion guide. The AI moderator needs it to run the session.
- Invite respondents from Recruitment. Each gets a personal link by email; nothing starts until they click it.
- When a respondent opens their link, their 1:1 interview starts on the spot (no entry form, no waiting room), capacity permitting: if the platform’s concurrent AI-interview limit is reached, they wait in the waiting room until capacity frees up. The AI moderator greets them, and recording starts after a short countdown.
- Watch live with Observe on the interview row, or review the recording and transcript afterwards.
See AI-moderated interviews for how the AI moderator works through a discussion guide.
How to ask rating and choice questions in the room
- In the guide panel, Show question puts a rating or choice question on every respondent’s screen, and Stop answers closes it. In a group, everyone answers at once: it works as a live poll.
- The panel shows the live tally: how many have answered, a chart, and each person’s answer. Enter answer records one for someone who said it out loud, and Change corrects one.
- Respondents never see each other’s answers. When a question allows it, Share results with the room shows everyone the percentages after you stop answers.
- To add a quick poll mid-session, edit the guide in the room and add a rating or choice question. The full walk-through is in Discussion guides.
Tips for researchers
- Treat Backroom like a facility backroom: observers are invisible to panelists everywhere, so brief clients that they can discuss probes and stimuli freely while the session runs.
- Auto-start threshold: Use AI Moderator fires once the Expected Respondents number of panelists is connected, so set that count precisely for groups. Recording does not wait for the full group; it starts with the first respondent.
- The staff-only Transcript tab live-transcribes the session and shows it translated into each viewer’s own language, handy when observers don’t speak the interview language.
- Invitations are personal, revocable links capped at Expected Respondents. Revoke a no-show to free the spot, or raise the count in Interview Settings to invite more.
- Removal is sticky: a removed participant can’t rejoin, even from a fresh link. Ended interviews block respondents from rejoining, but a moderator can rejoin to reopen the session.
- A page refresh reconnects to the same seat, but opening the meeting in a second tab disconnects the first. Tell respondents to keep exactly one tab open.
- Interview titles are hidden from panelists at every step, so encode topic, segment, or cell in the title for your own tracking.