Recruitment & screeners
Recruitment is how you find people to take part in your research. LetsFindWhy gives each study its own public signup page: you share one link (or a QR code) anywhere you like, and everyone who signs up lands in a list with their contact details, ready to be invited to an interview.
A screener (a short set of qualifying questions people answer when they sign up) sorts the good fits from the rest automatically. Every signup is also verified by email first, so fake or mistyped addresses never reach your list.
Say you’re building a mobile app and want to know why people stop opening it. Post your recruitment link on your social accounts, add a screener question like “Have you opened the app in the past month?”, and LetsFindWhy quietly marks the people worth interviewing. Nobody gets an awkward rejection.
Participants never need an account or an app. The signup page runs in any browser. And if you already have a customer list, you can paste it straight in from Excel or Google Sheets.
How recruitment works in LetsFindWhy
Recruitment is organized per process (a process is one study track, for example one per language or market). Four ideas cover everything on this page:
- Every process gets its own recruitment pipeline: a shareable signup link (with a QR code) that you switch on from the Recruitment page in the project sidebar.
- Link signups only count after the person clicks a confirmation link emailed to them. If the process has a screener assigned, they answer it right after confirming, and LetsFindWhy computes a pass/fail verdict.
- Screeners are written once in your organization-wide Screener Library, then assigned to processes on the project’s Screeners page, which is also where you read every answer and verdict.
- People you recruited elsewhere can be typed or pasted into a spreadsheet grid on the Recruitment page (the grid appears once the process has been activated). These manual entries skip email verification and the screener.
How to activate and share a recruitment link
You need to be a project manager or an organization Owner or Admin to manage links; other members can view them.
- Open Recruitment in the Project section of the sidebar.
- Find the card for the process you want to recruit for. Each card shows the process name and its language/country pairs; one that isn’t recruiting yet is marked Inactive.
- Click Activate. The card switches to a green “Active” dot and now shows the full signup URL, a Copy button, and a QR code.
- Click Copy (it flips to “Copied” for a moment) or let people scan the QR code. Share it on social media, by email, or through a panel provider.
- To pause signups, click Deactivate. The link keeps its address but visitors see “Recruitment Closed” until you click Activate again.
- If a link leaks, click Regenerate and confirm with Confirm Regenerate. A brand-new URL is issued and the old one stops working permanently. Anyone who kept it sees “Link Not Found”.
Once recruits exist for a language/country pair, that pair locks individually (“Locked: recruits have signed up for this pair”); pairs without recruits stay editable even after activation.
What participants see when they sign up
You don’t have to do anything here. This is what the people you recruit experience, so you know exactly what you’re sending them into.
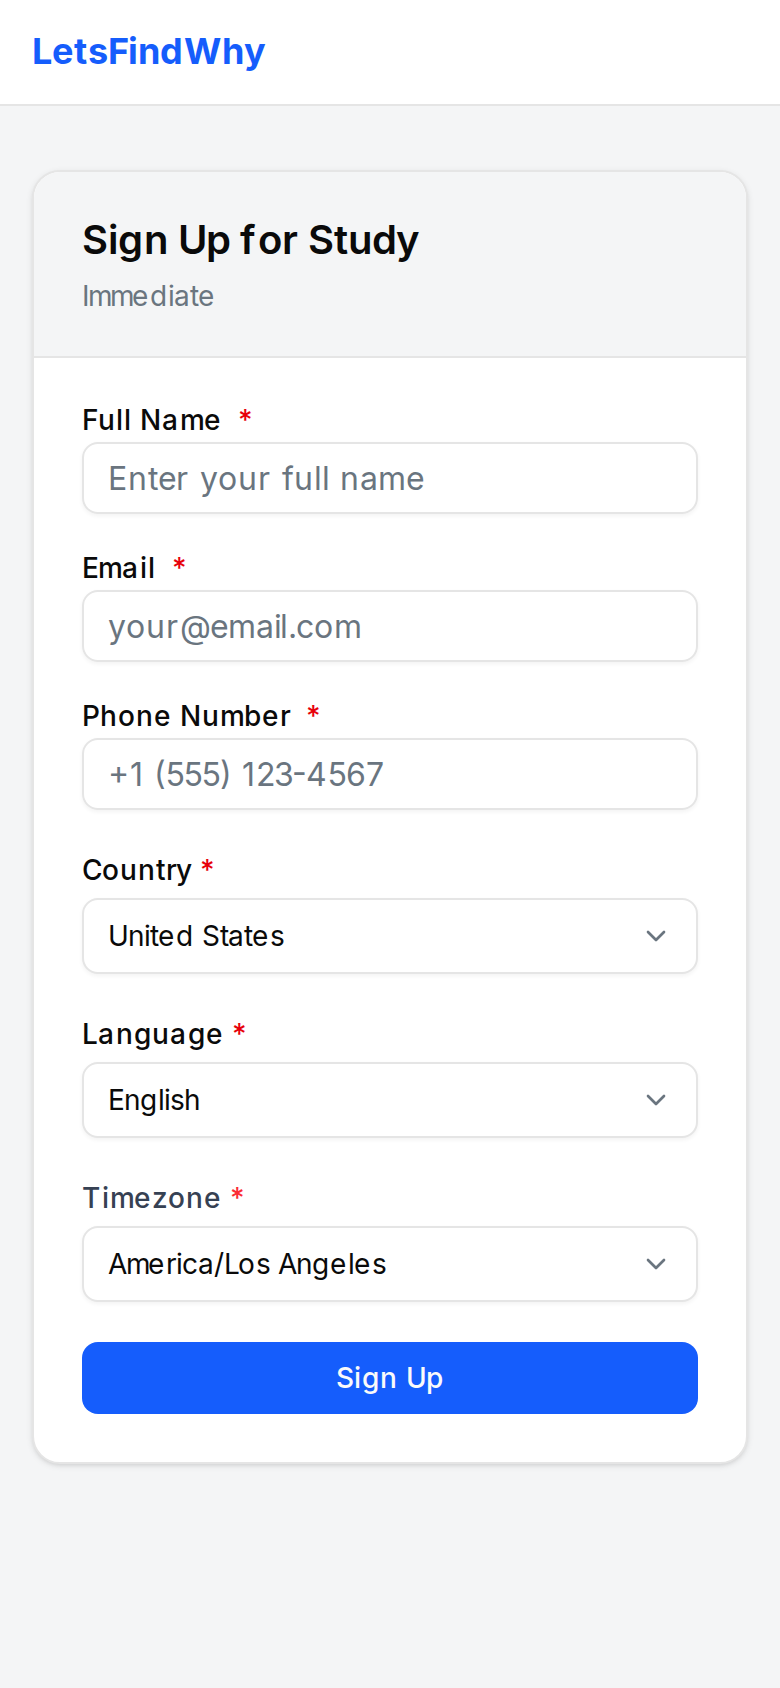
- The link opens a page headed Sign Up for Study with your study’s name on it.
- They fill in Full Name, Email, Phone Number, a country and language (only the pairs you configured on the process are offered), and their Timezone, then click Sign Up.
- The page switches to “Check your email”. Nothing is recorded yet. The signup only counts once they click the confirmation link sent to their address, which stays valid for 24 hours.
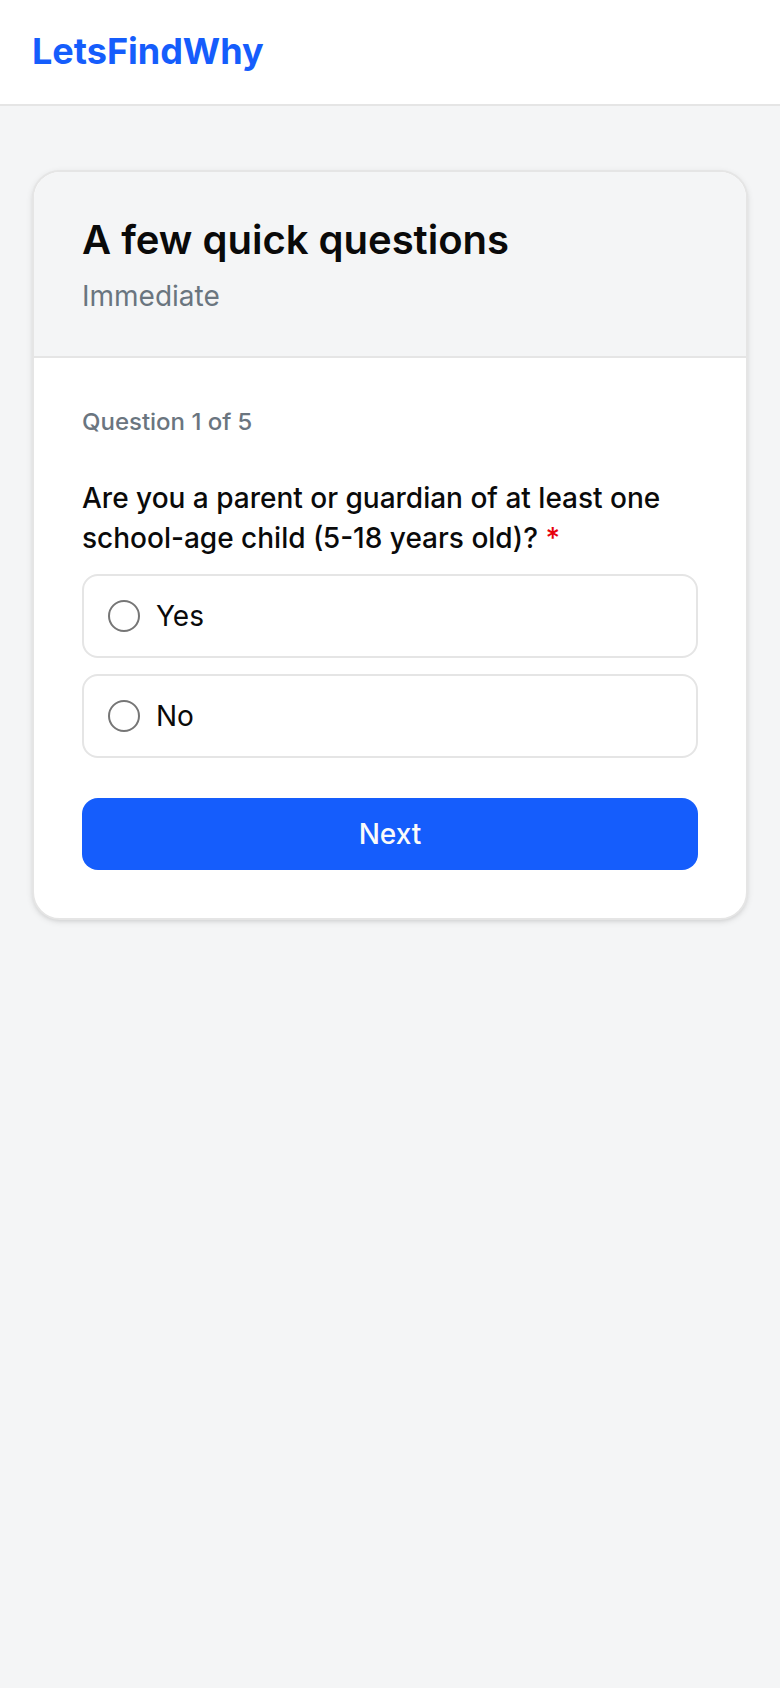
- If the process has a screener, the confirmation page shows “A few quick questions” and walks them through it strictly one question at a time. They can’t skip ahead, go back, or change an answer. They click Next after each question and Submit on the last one.
- Qualified (or unscreened) respondents finish on “You’re a great fit!”. Disqualified respondents see a neutral “Thank you for signing up!” They are never told they didn’t qualify.
- The verified signup now appears in the participants grid on Recruitment, and their answers and verdict on Screeners.
How to add participants from a spreadsheet
Already have participants (an existing customer list, or people a panel provider sent you)? Add them by hand. Saving and deleting needs a project manager or an organization Owner or Admin.
- On Recruitment, scroll to the grid below the process’s link card. The grid appears once the process has been activated, so click Activate first if it never has been (you can Deactivate afterwards and the grid remains). Its columns are ID, Name, Email, Phone, Country, Language, Timezone, and a read-only “Signed up” timestamp showing when each row was created.
- Type into the empty row, or paste a whole block of rows copied from Excel or Google Sheets. The grid grows to fit.
- Pick Country, Language, and Timezone from the dropdowns; only the process’s configured language/country pairs are offered, and new rows start with the first pair and your browser’s timezone.
- Click Save. Problem cells are highlighted first (“Duplicate email: fix the highlighted rows”), then the result is reported per row, for example “2 added”, “1 updated”, or “Email already exists for this process”.
- To remove someone, open the row’s action menu, choose delete, and confirm in the Delete participant? dialog. Deleting is permanent and also removes their screener answers and any session invitation.
Manual entries skip email verification and the screener entirely, so they don’t appear on the Screeners responses page and carry no verdict; their “Signed up” cell shows when the row was saved. You can still edit any row (link signups included) in place and save again.
How to create a screener in the Screener Library
Only organization Owners and Admins can create and edit screeners; every member can browse the library and preview them.
- Open Screener Library in the Organization section of the sidebar.
- Click New screener. In the Create Screener dialog, give it a Title (say, “Coffee Drinkers”) and an optional Description, then click Create Screener.
- Click Add question, type the Question text, and choose How they answer: Pick one, Pick several, Rating scale, Recommend score (NPS), Put in order, Number or Free text.
- Under Who qualifies, say which answers let someone through (see below). The sentence underneath reads the rule back in plain words, so you can check it says what you meant.
- Click Save question and repeat. Keep the screener short so respondents finish it.
- Switch to the Preview tab to step through the screener exactly as a respondent will. The final screen tells you whether your test answers “would qualify the respondent”.
Ways to answer, and who qualifies
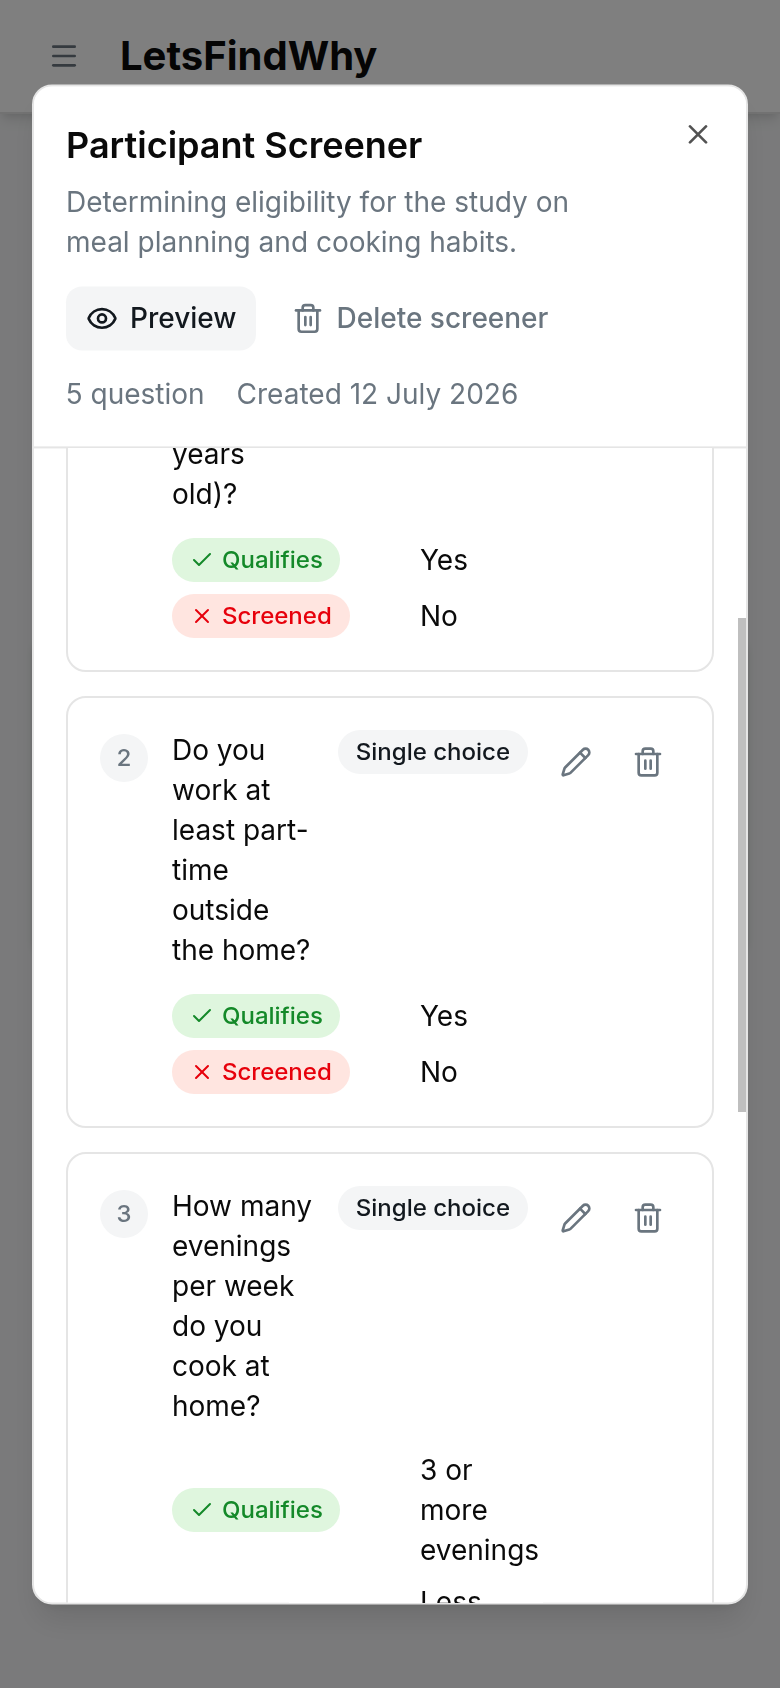
- Pick one: mark each option Qualifies or Screens out. For example, “Which code host does your team use?” where “We don’t use one” screens people out.
- Pick several: mark each option Must tick (they have to tick it), One of these (they have to tick at least one of the options marked this way), Either way (it doesn’t matter) or Screens out (ticking it rules them out).
- Rating scale, Recommend score (NPS) and Number: give a range, such as “between 4 and 5” on a 1 to 5 scale, or “between 10 and 500” deploys a month.
- Put in order: pick an item that has to be in their top places, such as “Fast builds” in their top 2.
- Free text never screens anyone out. Use it to learn something, not to filter.
- Choice questions can Allow “Other”, with a text box and Show options in a random order. A “None of these” option added with Add “None of these” unticks the others when someone ticks it.
On a sensitive question, tick Let people skip it with “Prefer not to say”. It is off by default, because offering it on every question draws answers into it. A skip never qualifies anyone unless you also tick “Prefer not to say” qualifies under Who qualifies.
Once anyone has answered a question, how it is answered is locked: its format, its scale and a number’s lowest and highest can no longer change, because the results would mix answers given to different questions. You can still reword it, rename options and add new ones. Deleting an option hides it from new respondents and keeps it in earlier answers. To ask it a different way, add a new question.
How to assign a screener and review responses
- Open Screeners in the Project section of the sidebar.
- On the process card, pick a screener from the Screener dropdown. Options are grouped under “This project” and “Organization library”; choose No screener to unassign.
- That’s it. New signups now answer the selected screener. Recruits who already signed up stay pinned to whichever screener was assigned at the time, so a swap never re-judges them against questions they never saw.
- Review the responses below: each row shows the “Respondent”, their “Verdict” (“Qualified”, “Screened” for disqualified, or “No verdict” for unscreened) and when they “Completed” the screener, with their full answers underneath.
- If the process’s screener changed over time, responses are grouped per screener. Groups from a screener you delete disappear along with their answers. Only the stored verdicts survive.
How to see a screener’s results
The results page adds up everyone who answered a screener, across every project it recruited for, so you can see who is getting through and why.
- Open the screener in the Screener Library and click Results.
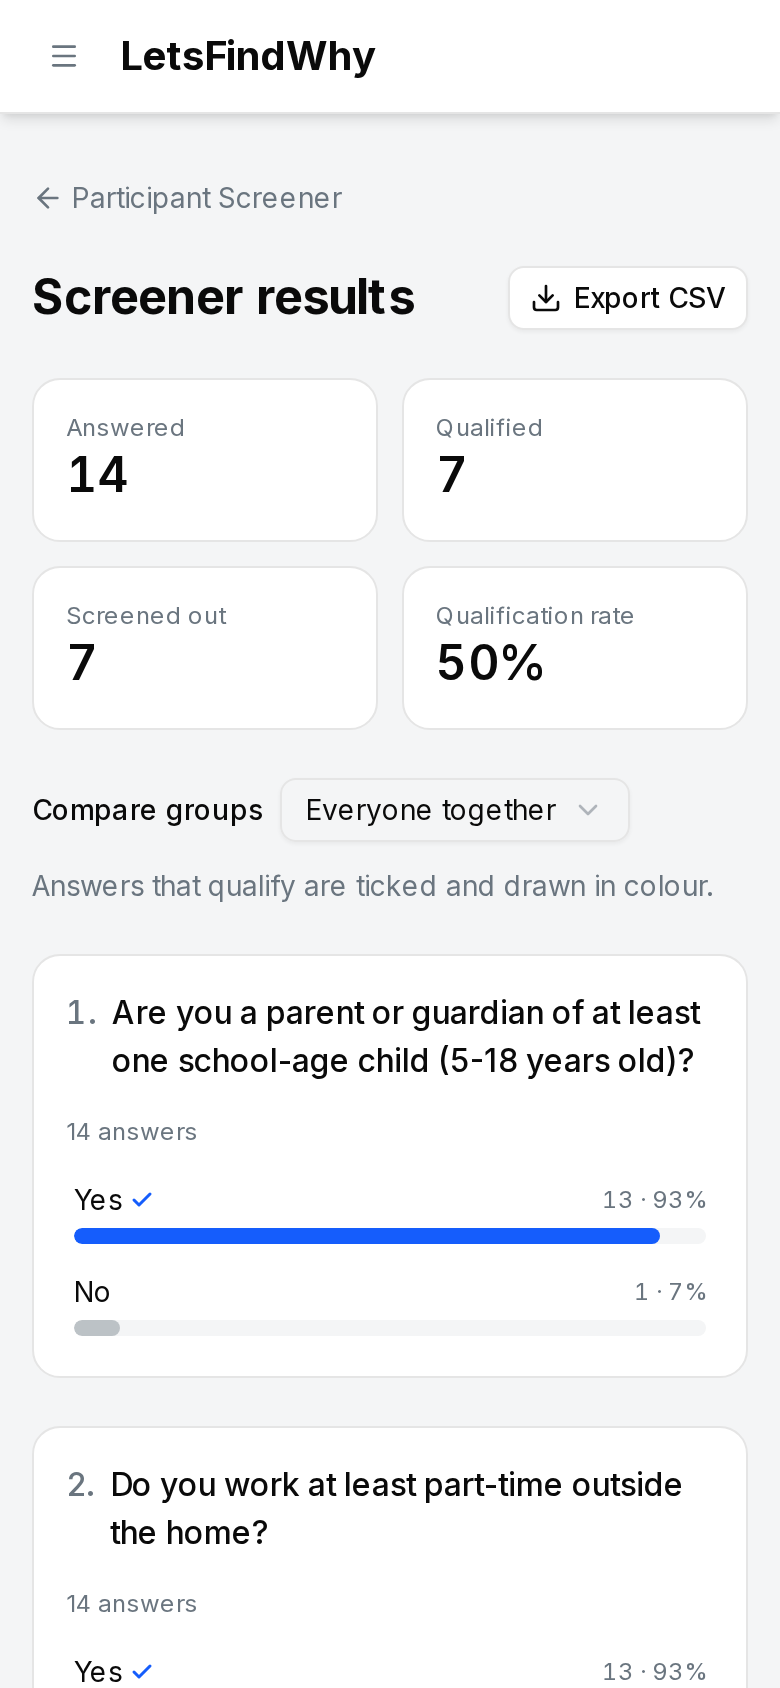
- Read the totals at the top: how many answered, how many qualified, how many were screened out, and the qualification rate.
- Under them is a chart for every question. Answers that qualify are ticked and drawn in colour, so a question screening out more people than you expected stands out.
- Click a bar to list the people who gave that answer, with whether they qualified. Use Compare groups to split every chart by another question, for example how often each team size deploys.
- Click Export CSV for a spreadsheet with one row per respondent: their name, email, when they signed up, whether they qualified, and each answer.
A library screener can recruit for several projects. The results only count respondents in projects you can open, so two teammates may see different totals.
Next: consent
After screening comes consent. If the process has consent forms, the signup page shows them read-only under “What taking part involves”, and everyone you invite reads and signs them before their interview. See Consent forms.
Tips for researchers
- Run one process per market or language cell: each has its own link, so you can hand different links to different panel providers and revoke a single leaked one with Regenerate without touching the rest.
- The screener is hard to game: qualifying options are never revealed, later questions are never sent to the browser early, answers are forward-only, and disqualified respondents get a neutral ending they can’t learn from.
- Every answer keeps a copy of the question as it was asked, and whether it passed the rule at the time, so editing a live screener never rewrites history or re-judges anyone, and a question you add later never disqualifies earlier signups.
- The verdict is deterministic: a question whose rule lets everyone through never affects it, free text never does, and a respondent qualifies only if every one of their answers passed its question’s rule.
- One signup per email per process. If someone re-submits the form before verifying, the earlier email link is invalidated and the screener restarts from question 1 against the currently assigned screener.
- Deleting a library screener discards its captured answers and unassigns it from every process, but respondents’ stored qualified/disqualified verdicts survive.
- Limits worth knowing: 2–20 options per choice question, option text up to 500 characters, question text 2,000, and spreadsheet saves handle up to 100 new and 100 edited rows at a time.