Recording & playback
When you record an interview in LetsFindWhy, the whole session is saved to your project: every participant’s video and audio, plus the AI moderator if one joined. Afterwards you can watch it back, search what was said, download the video, or review it with your team.
There’s nothing to set up. Every session records itself: recording begins moments after the first respondent joins, and the moderator can stop and restart it at any point. When you stop, LetsFindWhy combines everyone’s video into a single file and writes a transcript (a written, searchable record of who said what).
You’ve just redesigned your app’s checkout and interviewed five users about it. Every conversation lands on the project’s Recordings page, so on Friday you can rewatch the key moments, jump to each mention of “checkout”, and your product manager can catch up on the sessions they missed.
How recording works: who can record, and where recordings go
Only the session’s moderator, the person running the interview, can start and stop recording; panelists (your respondents on camera) and observers (teammates watching silently) never see the controls. Everyone in the room can see that it is running, though: a red REC marker with a running timer sits in the meeting, and the More options (three-dot) button picks up a red ring.
A recording moves through simple statuses on the project’s Recordings page: Recording while the session is being captured, Processing while everyone’s video is combined into one file, then a Play label once it’s ready to watch. Recordings you brought in yourself carry an Uploaded badge.
You can stop and restart recording in the same session. Each start/stop cycle becomes a segment, and all segments are combined into one video, so the session plays back as a single recording however many times you stopped.
Anyone in your organization with access to the project can play and download recordings and read their transcripts. Attending the live session isn’t required. Deleting is limited to the session’s owner, project managers, and organization admins.
Recordings are made at your plan’s video quality: HD (720p) on Starter, and Full HD (1080p) on Professional, Business and Enterprise.
How to record a meeting
Sessions record themselves, so most of the time there is nothing to do here. These steps are for the moderator starting a recording by hand, in a session that isn’t already recording.
- Join the interview as its moderator.
- Click More options (the three-dot button) in the control bar and choose Start recording. It shows “Starting…”, then recording begins and every admitted participant is captured.
- To stop, open More options again and choose Stop recording. The video and transcript start processing automatically.
- Record again whenever you like. Each start/stop cycle is saved as another segment of the same recording.
Only one recording can run at a time, and people still in the waiting room aren’t captured until you admit them. Anyone who joins after recording starts is added automatically, and ending the meeting for everyone also stops the recording.
When recording starts
Every interview records itself, with nothing to switch on beforehand. When the first respondent joins the meeting, a three-second countdown appears for the respondent, the moderator, and any observers, and recording begins as it reaches zero. Nobody has to remember to press record, and nobody starts being recorded without a warning on screen.
Letting someone in from the waiting room is where you choose. Admit opens a short menu: Admit & record brings them into the meeting and starts the countdown, and Admit without recording brings them in and leaves the session unrecorded.
Choosing Admit without recording doesn’t rule recording out for the rest of the session. Start it whenever you’re ready with Start recording, and stop it again the same way.
The automatic start fires at most once per session and only respondents trigger it. Moderators, observers, and the AI moderator don’t. If the session already has a recording, it doesn’t fire again, so a recording you stopped on purpose stays stopped until you restart it.
How to find and play back a recording
- Click Recordings in the project sidebar.
- Find your session. Each card shows the title, date, Duration: and Size:, plus status badges. A Play label appears once the video is ready.
- Click the card. If the video is still being prepared you’ll see “Processing recording”. The page checks every few seconds and switches to the player on its own.
- Watch with the player controls: Play / Pause in the control bar, flanked by Seek back 10 seconds and Seek forward 10 seconds. (On small screens the play button sits centred over the video instead.) Keyboard shortcuts work too: space plays and pauses, the arrow keys skip 10 seconds, m mutes, and f toggles fullscreen.
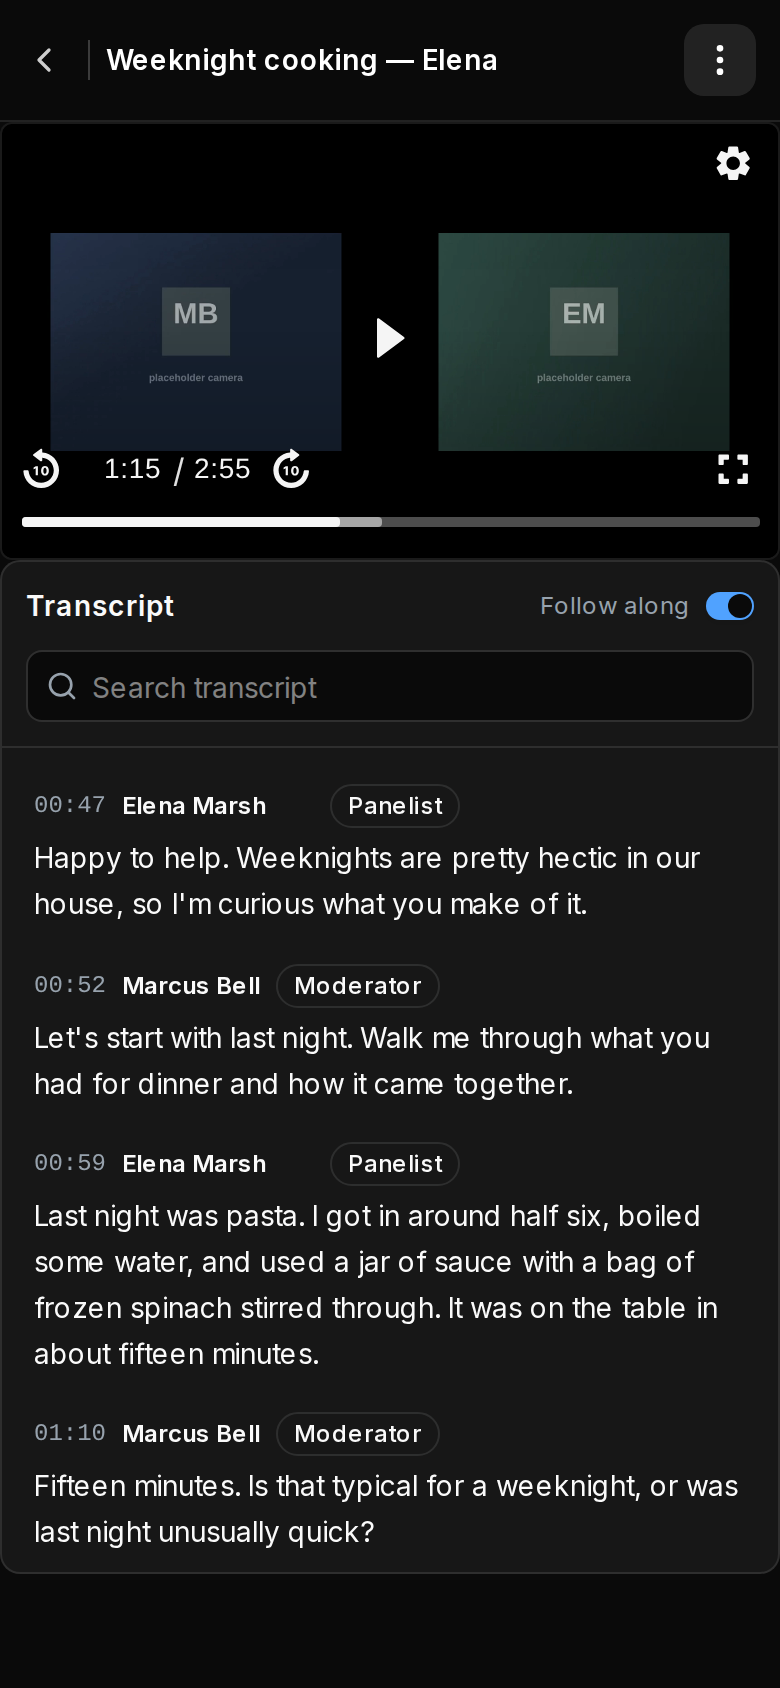
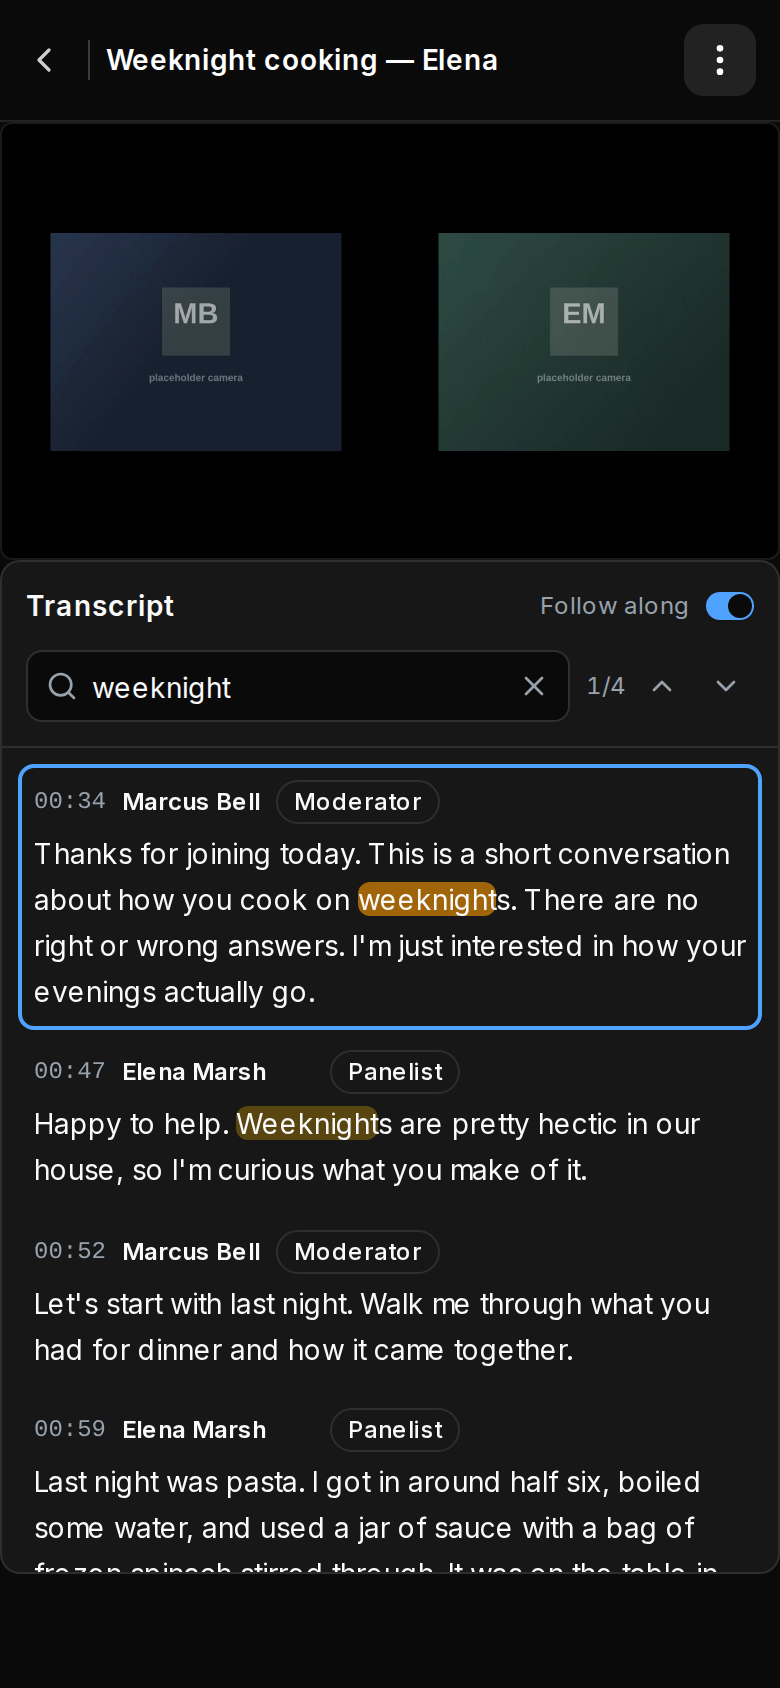
- Read along in the Transcript panel beside the player: switch on Follow along to highlight the words as they’re spoken, type into Search transcript to step through matches, or click any line to jump the video to that moment. Every line names its speaker with a role badge: Moderator, Panelist, or Observer. An AI badge marks the AI moderator.
If the session used a discussion guide, the transcript also carries a marker at each guide question. Clicking one jumps the video there; the small compare icon beside it opens the project’s Responses page at that question, where every respondent’s response to it is collected side by side.
Answers to rating and choice questions get a marker of their own at the moment they were given, such as “Sam answered 4/5” with how it was given: tapped, said aloud, or entered by the moderator. Click it to jump the video there. An answer given while nothing was recording has no marker, though it still counts on the Responses page.
Just left a recorded meeting? Click View Recording on the meeting-ended screen to go straight to playback. For renaming speakers and everything else the transcript can do, see Transcripts.
How to download a recording
- On the recording’s page, click the Recording options (three-dot) button in the header.
- Click Download. The menu item shows the file size and stays greyed out until processing has finished.
- Your browser saves the full session as a single MP4 file, ready for backup or analysis elsewhere.
How to delete a recording
Deleting removes the session’s recording and its transcript permanently. There’s no undo and no per-segment delete. Only the session’s owner, project managers, and organization admins can delete.
- On the recording’s page, open Recording options and click Delete. It works in every state, even while a recording is still processing, or after it failed.
- Read the confirmation: “Delete this recording? This permanently removes the recording and its transcript. This can’t be undone.”
- Click Delete to confirm, or Cancel to keep it. You return to the Recordings list, where the session no longer appears.
Consent records are not part of a recording. Deleting a recording, or your retention window removing it, leaves the participant’s consent records in place, so you can still show what they agreed to.
Can I upload a recording from Zoom or another tool?
Already have interviews recorded on Zoom, a phone, or another tool? Upload the files and they become regular LetsFindWhy recordings: playable, transcribed, downloadable, and deletable like any other.
Open the Recordings page, click Upload media or drag files onto the page, and the file becomes a recording with an Uploaded badge. Uploads draw on your organization’s billed-minute allowance, so a file longer than the minutes you have left is rejected. For the full walkthrough, including resuming an interrupted upload, see Uploads & media.
Tips for researchers
- Make the recording notice part of your opening rather than something you say while reaching for a button. If a respondent hasn’t agreed yet, let them in with Admit without recording and start recording once they have.
- Playback isn’t limited to attendees: any organization member with project access can review recordings and transcripts, so analysts and client-side teammates can catch up on sessions they never joined.
- Use segments deliberately: stop recording during breaks or off-record moments and start again after. Everything merges back onto one timeline as a single video.
- Download MP4s for coding in external analysis tools. In the player itself, streaming links refresh in the background and keep your position, so you can review for a long stretch without reloading.
- Consolidate past studies by uploading legacy interview files: they get the same player and searchable transcript, giving all your qual material one home.
- Deletion is total: video and transcript together, across all segments. If there’s any chance you’ll need a session again, download the MP4 first.